Don't Skimp on Your Kit Home's Insulation: Staying Cool and Warm in Australia
Listen up. Building a kit home in Australia, especially a steel-framed one, means you've got to get serious about insulation. We're talking more than just chucking some batts in the wall. This isn't just about comfort, not even close. It's about designing a house that actually works for our extreme weather, one that doesn't cost you an arm and a leg in power bills every single month. Trust me, I've seen enough owner-builders get this wrong, then spend years kicking themselves.
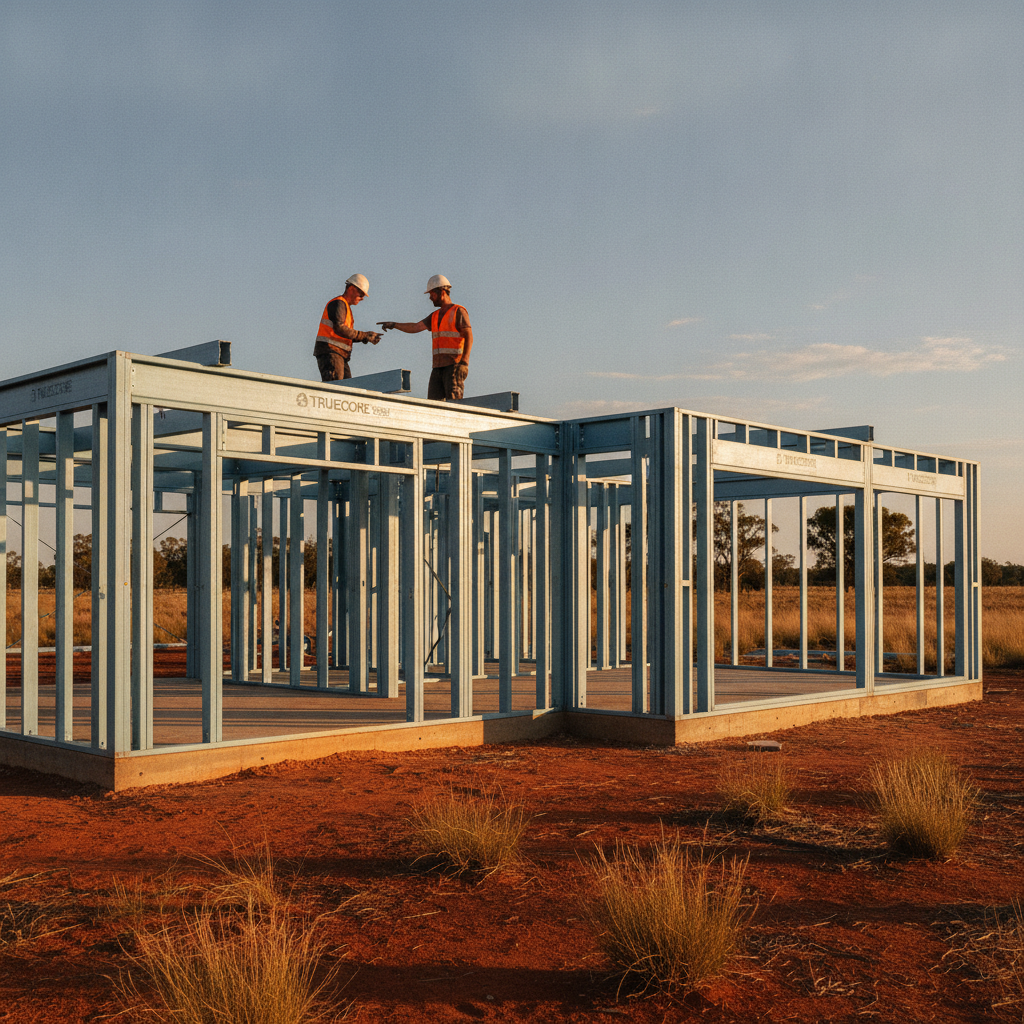
You can have the best BlueScope TRUECORE steel frame on the market, strong as an ox, termite-proof, straight as a die. But if your insulation is dodgy, it's all for nothing. Your house becomes a thermal sieve. We're going to talk about insulation best practices here, what works, what doesn't, and how to make sure your kit home keeps you cool when it's 40 degrees outside and warm when the southerly blows through.
Understanding Australia's Climate Zones - It's Not One-Size-Fits-All
First things first, Australia isn't just 'hot'. We've got eight distinct climate zones under the National Construction Code (NCC) Volume 2. Forget what worked for your mate in Perth if you're building near Cairns. Each zone has specific requirements for thermal performance. And this is where many folks trip up.
- Zone 1: Hot Humid Summer, Warm Winter (e.g., Darwin, Cairns). Think cyclonic winds, heavy rain, and heat that doesn't let up. Here, insulation needs to manage heat gain and moisture.
- Zone 2: Hot Humid Summer, Mild Winter (e.g., Brisbane). Similar to Zone 1 but with slightly milder winters.
- Zone 3: Hot Dry Summer, Warm Winter (e.g., Alice Springs, Kalgoorlie). Massive temperature swings between day and night. You need insulation that handles both extremes.
- Zone 4: Hot Dry Summer, Mild Winter (e.g., Sydney, Perth). Still gets hot, but nights can cool off.
- Zone 5: Warm Temperate (e.g., Adelaide, Melbourne). Four distinct seasons. Good all-rounder insulation is key.
- Zone 6: Mild Temperate (e.g., Hobart). Cooler climate, so heat retention is a priority.
- Zone 7: Cool Temperate (e.g., Canberra, Armidale). Proper winter, often with frost and snow. High R-values are non-negotiable.
- Zone 8: Alpine (e.g., Thredbo). Extreme cold. You need serious insulation here, the kind that might feel like overkill in other zones.
Your local council will have requirements based on your specific zone. Don't guess. Check the NCC and your building certifier's advice before you even think about ordering batts.
The R-Value: Your Best Mate or Your Worst Enemy
Everyone talks about R-value. It's just a number, right? Well, it's the measure of thermal resistance. The higher the R-value, the better the insulation's ability to resist heat flow. Simple as that. But here's the kicker for steel frames:
Steel Frames and Thermal Bridging - The Cold (or Hot) Hard Truth
Steel is a conductor. It's heaps stronger than timber, doesn't warp, and termites hate it, which is brilliant. But those C-sections and top hats? They can act like tiny thermal bridges, transferring heat or cold straight through your wall or roof structure. This is called 'thermal bridging', and it reduces the effective R-value of your entire wall system. You can have R2.5 batts in there, but if the steel frame is conducting heat, you're losing performance.
Dealing with Thermal Bridging in Steel Frames
This is where smart insulation choices come in:
- Thermal Breaks: This is a non-conductive material placed between the internal lining and the steel frame. Think a thin layer of foam or a reflective foil product. It literally breaks the path of heat transfer. Essential for walls and roofs in most climate zones.
- Sarking and Vapour Barriers: We supply sarking with our kits for a reason. It's not just a secondary weather barrier; many modern sarking products have a reflective surface that adds an R-value to your roof and wall system. It also acts as a vapour barrier, crucial for preventing condensation inside your wall cavity, especially in humid climates or where internal temperatures vary wildly from outside. Condensation can lead to mould and rot, even in steel frames (though the steel itself won't rot, your plasterboard and timber linings might).
- Higher R-Value Batts: Sometimes, the simplest answer is just to use thicker, higher-density batts. If you're using R2.5 batts, maybe jump to R3.0 or R3.5 for your walls. For roofs, R5.0 or even R6.0 isn't uncommon in cooler zones.
- External Wall Insulation: Consider adding a layer of rigid insulation board (like polyiso or XPS) on the outside of your steel frame, under your cladding. This creates a continuous insulation layer that completely mitigates thermal bridging through the studs. It adds cost, yes, but the long-term energy savings can be substantial, especially for owner-builders keen on future-proofing their home.
Types of Insulation for Kit Homes
You've got options beyond just pink batts:
1. Batts (Glasswool, Polyester, Rockwool)
- Glasswool: The most common, affordable, and readily available. Comes in rolls or pre-cut batts. Good thermal performance. Wear a mask and gloves, it can be itchy.
- Polyester: Made from recycled plastic bottles, it's itch-free and great for allergy sufferers. Often a bit pricier than glasswool.
- Rockwool: Made from volcanic rock, excellent for thermal and acoustic insulation, plus it's fire-resistant. Heavier and more expensive.
Owner-Builder Tip: When installing batts into a steel frame, make sure they are cut precisely to fit snug between the studs and noggins. No gaps! Any gaps are thermal shortcuts. Don't compress them either; insulation needs its loft to work effectively.
2. Reflective Foil Insulation / Sarking
This is supplied with most of our kits for roof and wall applications. It works by reflecting radiant heat. Essential under roofing to stop downward heat flow in summer and upward heat loss in winter. Combined with an air gap, it's very effective. Always ensure there's an air gap on at least one side for it to work properly – that's why it goes under your roof battens and cladding.
3. Rigid Insulation Boards (PIR, XPS, EPS)
These are fantastic for continuous insulation, as mentioned earlier. They offer high R-values for relatively thin profiles. They're usually more expensive upfront but offer superior thermal performance. Can be used under concrete slabs, on external walls, or within walls where space is tight.
4. Loose-Fill Insulation (Blow-in)
Often used in existing homes or awkward spaces. It's blown into cavities. Great for filling all the nooks and crannies, eliminating gaps. Probably not your first choice for a new steel-framed kit home unless you have specific void areas.
Insulating Different Parts of Your Kit Home
Roof Insulation - The Heat Pump
Your roof is your biggest enemy in summer. All that sun beating down? It turns your roof cavity into an oven. You need heavy-duty roof insulation. Think high R-values here, plus sarking with a reflective surface. Our kits come with roof sarking for a reason. Consider a thermal break under your roofing if you're in a scorching zone. A well-ventilated roof cavity helps too, letting trapped hot air escape.
Wall Insulation - Keep the Air Inside
Between your TRUECORE steel studs, you'll be fitting batts. Again, ensure they're cut to fit perfectly. For external walls, adding a reflective foil or a thin rigid board on the outside under your cladding can seriously boost your performance, especially against that radiant heat from the sun hitting your walls all day. Internal walls usually just need sound insulation, not thermal, unless you're specifically trying to create different thermal zones inside.
Floor Insulation - Don't Forget Down Below
If you're building on stumps or bearers and joists, floor insulation is crucial. Cold air rising from under your house can chill the whole place. Batts designed for floors (often foil-faced) are installed between joists. For slab-on-ground construction, edge insulation for the slab itself is often required in cooler climates to prevent heat loss through the slab's perimeter. It's a small detail, but makes a big difference.
The Importance of Air Sealing
Insulation is only half the battle. Air leaks are insulation killers. All those tiny gaps around windows, doors, electrical outlets, plumbing penetrations? They add up. They let conditioned air out and unconditioned air in, bypassing all your expensive insulation.
Owner-Builder Tip: Invest in good quality sealants and expanding foam. As you're putting up your plasterboard, seal around every penetration. It's fiddly, but it makes a massive difference to your home's performance. Think about draft stoppers for doors too.
Beyond the Batts: Passive Design Principles
Good insulation works hand-in-hand with smart design. This is called passive design:
- Orientation: Get your house facing the right way. North-facing living areas let in winter sun, south-facing walls get less direct sun.
- Shading: Eaves, pergolas, and strategically placed trees keep summer sun off your windows and walls.
- Window Placement: Cross-ventilation is key in hot climates. Place windows on opposite sides of rooms to create airflow. Double-glazed windows, while a bigger upfront cost, are worth their weight in gold for thermal performance.
- Thermal Mass: A concrete slab, for example, can absorb heat during the day and release it at night (or vice versa). This works brilliantly when combined with good insulation and strategic ventilation.
Final Word on Insulation
Don't just meet the minimum NCC requirements for your climate zone; try to exceed them if your budget allows. Especially with a steel-framed kit home, where the thermal bridging needs careful consideration. You're building this house to last, and a well-insulated home means a comfortable home, lower energy bills, and a higher resale value down the track. It's one area where cutting corners will absolutely bite you later. Do the research, get the right R-values, install it properly, and your kit home will be a pleasure to live in, whatever the Australian weather throws at it.