I was standing on a slab out near Mudgee last August, watching a bloke try to hose three weeks of dried mud off his Kelpie while the wind whipped across the paddock at forty knots. The dog was happy as Larry. The owner? Not so much. He just looked at me and said, I should've built a bigger laundry. That stayed with me. Because when we talk about kit homes in Australia, we usually obsess over the kitchen island or whether we want the cladding horizontal or vertical. We forget about the four-legged roommates who actually spend the most time on the floor.
Most kit home designs are born in an office, but they live in the real world where it rains, dogs shed, and cats launch themselves off bookshelves at 3am. If you're going the owner builder route, you have a massive advantage. You aren't stuck with a cookie-cutter layout from a massive developer who thinks a cat is something you only see on YouTube. You're the boss. You can tweak things. And if you want to turn a standard mudroom into a high-tech canine decontamination zone, nobody is going to stop you.
The Mudroom is Not Optional
In the city, a mudroom is a luxury. In a rural or suburban kit home, it's a structural requirement for your sanity. Don't just tick the box for a standard laundry. Look at the floor plan and see if you can widen that entry point from the back deck. We see a lot of people choosing steel frame kits because they're dead easy to modify during the planning stage. You want to add an extra metre of width to the utility room to fit a raised dog wash station? Do it now. It's much harder once the slab is poured and the TRUECORE steel is bolted down.
Think about the height of your taps. A lot of owner builders forget that washing a Great Dane is different from washing a Maltese. A handheld shower rose tucked into the laundry wall, right near the back door, saves you from dragging a wet, shaking dog through the house. Use a heavy-duty floor tile with a high slip rating. Polished porcelain looks great in magazines but it's basically an ice rink for a dog with wet paws. Look for something with a R10 or R11 slip rating. Your dog's hips will thank you when they're older.
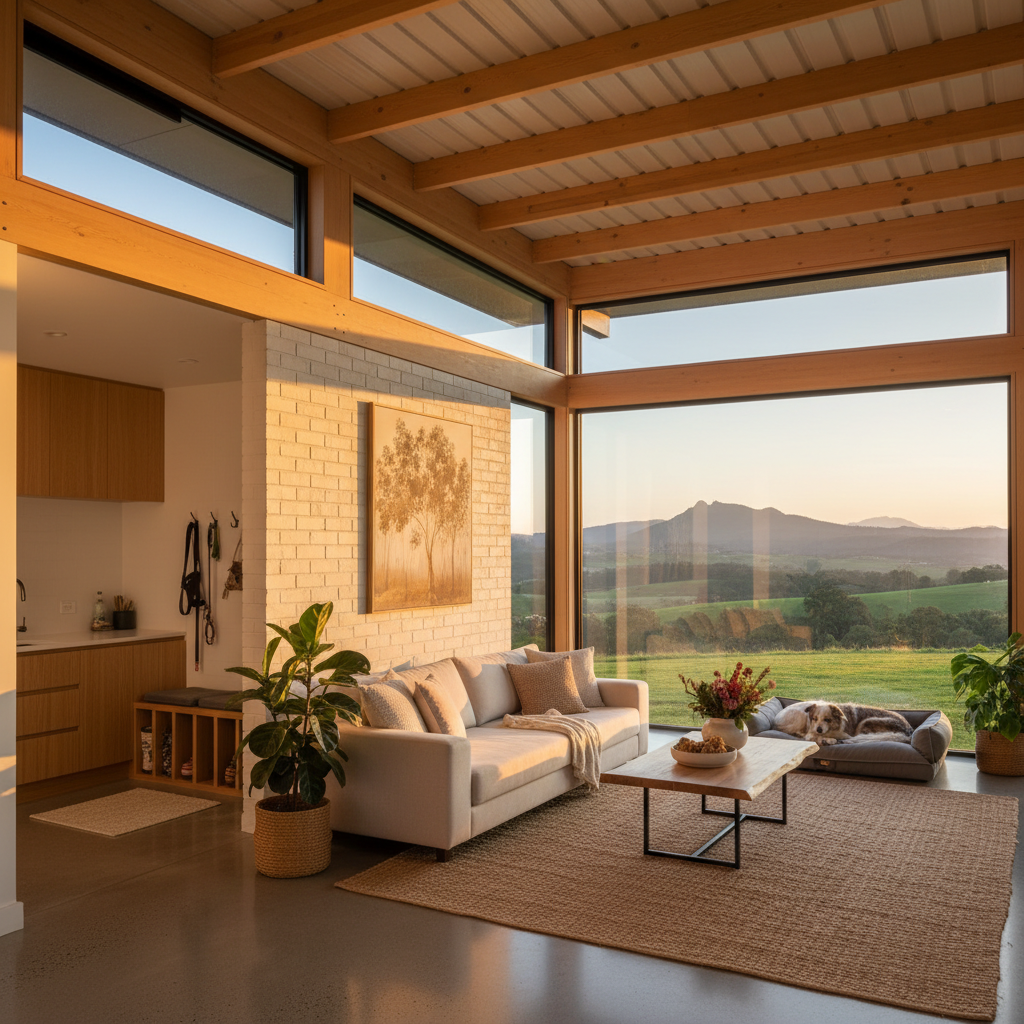
Flooring that Survives the Zoomies
Let's talk about the big one. Flooring. I've seen beautiful timber floors ruined in six months by a Boxer who treats the hallway like a drag strip. If you're building a kit home, you're usually looking for value and durability. Hybrid flooring is the king here. It's got that limestone core so it's stable, and the wear layer can handle claws without scratching every time the doorbell rings. Plus, it's waterproof. When the water bowl gets flipped, or someone has an accident, it doesn't soak into the subfloor and start smelling like a kennel.
But if you really want to do it right, look at burnished concrete. If your kit is going on a slab, talk to your concretor about a high-quality finish. It's cool in the NSW summer, which dogs love, and you can literally hose it out if things get desperate. Just remember that concrete is hard on old joints. Throw down some rugs with non-slip backing in the areas where your mates like to nap.
Thermal Comfort and Steel Frames
Animals feel the heat way more than we do. Their cooling system is basically just panting and a bit of sweat through the paws. This is where your choice of kit materials really matters. A kit home with a Colorbond roof and proper insulation pads makes a world of difference. We always suggest people go for the Anticon blanket under the roof sheets. It stops the heat from radiating down into the ceiling cavity, which keeps the house significantly cooler for pets left inside during the day.
And because these homes use steel frames, you don't have to worry about the chemical treatments often found in timber. No arsenic or offshore pesticides. Just clean, blue-tinted steel. It's a small detail, but when you've got a puppy that insists on chewing every corner and skirting board in sight, having a non-toxic skeleton in the walls provides a bit of peace of mind.
Window Heights and the Sticky Nose Factor
Have you noticed that dogs spend half their lives looking out windows? Yet, most standard kits put the sills at 900mm or 1000mm. That's fine for humans, but for a Border Collie, it's like living in a bunker. When you're looking at your window schedule, consider dropping a few sills. Picture windows that go closer to the floor allow your pets to see the world without jumping up and scratching the paintwork. Just make sure you're using toughened glass as per AS 1288 requirements. Dogs are clumsy. They run into things. If they hit a floor-to-ceiling pane, you want that glass to stay in one piece or break safely.
Also, think about ventilation. Louvres are brilliant for the tropics or North Queensland builds because they provide airflow even when it's raining, but they can be a security risk for smaller pets. Double-hung windows are a better bet. You can drop the top sash to let the hot air out while keeping the bottom one shut so the cat doesn't go on a midnight wander.
The External Yard and BAL Ratings
In Australia, we have to deal with Bushfire Attack Levels (BAL). If you're building a kit home in a BAL-29 or BAL-40 zone, your pet's outdoor area needs to be compliant too. Don't build a timber dog house right against a steel-clad kit home. That's just fuel for a fire. Use leftover cladding from your kit to build a matching, non-combustible dog shelter. It looks better and it's much safer.
Consider the fencing too. If you're an owner builder, you're probably doing the landscaping yourself. Make sure your perimeter fence goes deep. I knew a bloke in Gippsland who built a stunning kit home, only to have his Jack Russell dig under the fence and disappear into the scrub on day three. If you're on reactive clay, your fence might move, creating gaps. Trench in some chicken wire or use a concrete plinth at the base of the fence line. It's a weekend of hard work that saves years of stress.
Practical Kit Home Tips for Pet Owners
- Check your door clearances. If you're installing a cat or dog door after the kit is assembled, make sure you aren't cutting through a structural member of the door frame.
- Plan your power points. Put one in the pantry or a dedicated cupboard for a cordless vacuum. You'll be using it daily to deal with the fur.
- Think about noise. Steel frames are incredibly strong, but sound travels through them if you don't use acoustic batts. If you have a barker, insulate the internal walls of the media room or laundry to keep the peace.
- Consider a mud-tap. It's just a cold-water tap located right next to the external door, separate from the garden hoses. Perfect for a quick paw-rinse.
Building a kit home is a massive project. It's exhausting, it's a steep learning curve, and you'll probably end up with more grey hairs than you started with. But there's a specific kind of magic in sitting on your new deck at sunset, cold beer in hand, with your dog sprawled out at your feet. You built that. You made sure the floor wasn't too slippery for their old paws and that they had a window to watch the magpies from. That's not just a house. That's a home for the whole pack.


