Get Your White Card Before You Get Your Hammer
Most blokes and birds think the first step to building a kit home is picking out a kitchen tap or arguing over floor tiles. It isn't. The very first thing you need to do, before you even look at a site plan, is sit your Owner Builder course. In states like NSW, QLD, and VIC, you can't just rock up to a site and start calling the shots without that permit. You'll need your White Card too. Think of it as your entry ticket to the circus. Without those bits of paper, you're not a builder, you're just a trespasser on your own dirt.
Being an owner builder means you're the one on the hook for site safety. If a sparky trips over a stray piece of timber because you didn't clean up the site on Friday afternoon, that's on you. The courses cover the legalities and the safety bits, but they don't teach you how to deal with a council planner who’s having a bad Tuesday. That’s where the real work starts.
The Paperwork War: DA, CC, and the Rest
Don't expect the council to be your mate. You'll start with the Development Application (DA). This is where you tell them what you want to do, and they tell you all the reasons why you can't. You'll need a site plan showing every tree and contour. If you're building in a rural area, you'll need to know your Bushfire Attack Level (BAL) rating. A BAL-40 rating isn't just a number, it means you're going to be spending more on toughened glass and specialized mesh for your windows. It changes the game entirely.
Once the DA is sorted, you move to the Construction Certificate (CC) or the equivalent in your state. This is the technical stuff. This is where your engineering plans for the steel frames come in. We use BlueScope TRUECORE steel because it’s straight. Timber moves. It bows and twists while it's sitting on the grass waiting to be used. Steel stays exactly where you put it. When the building inspector comes around to check your framing, they’re looking for compliance with AS 1684 or the relevant steel standards like AS 4100. If your frame isn't plumb, your plasterer will charge you double because he’s got to fix your mess with extra mud.
Site Prep and the Slab
Preparation is where most DIYers blow the budget. You think the ground is flat, then the excavator turns up and suddenly you're moving 200 cubes of dirt you didn't account for. You need a solid pad. If you're going with a concrete slab, make sure your plumber gets his 'rough-in' exactly right. Once that concrete is poured, moving a toilet pipe ten centimeters to the left involves a jackhammer and a lot of swearing.
While the slab is curing, it's a good time to organize your trades. Don't call them the week you need them. Good tradies are booked out months in advance. You want to be the guy who has everything ready on site so they can just get in and do their job. Have the water connected. Have a portaloo on site. If you treat your tradies like pros, they’ll treat your house like it’s their own.
The Arrival of the Kit
The day the truck arrives with your kit is like Christmas, but with more heavy lifting. You'll get your frames, your roofing, cladding, and those windows you picked out. It’ll arrive on a semi-trailer, so make sure you’ve actually got room for the truck to turn around. I’ve seen people try to get a 19-metre truck down a goat track in the Blue Mountains. It doesn't work.
Inventory everything. Check the packing list twice. You don't want to be halfway through the roof and realize you're short on tek screws. Our kits come with insulation and doors too, so you need a dry place to store the stuff that can't get wet. Stack your steel frames off the ground on some dunnage. If they sit in the mud, you’re just making your life harder when you go to stand them up.
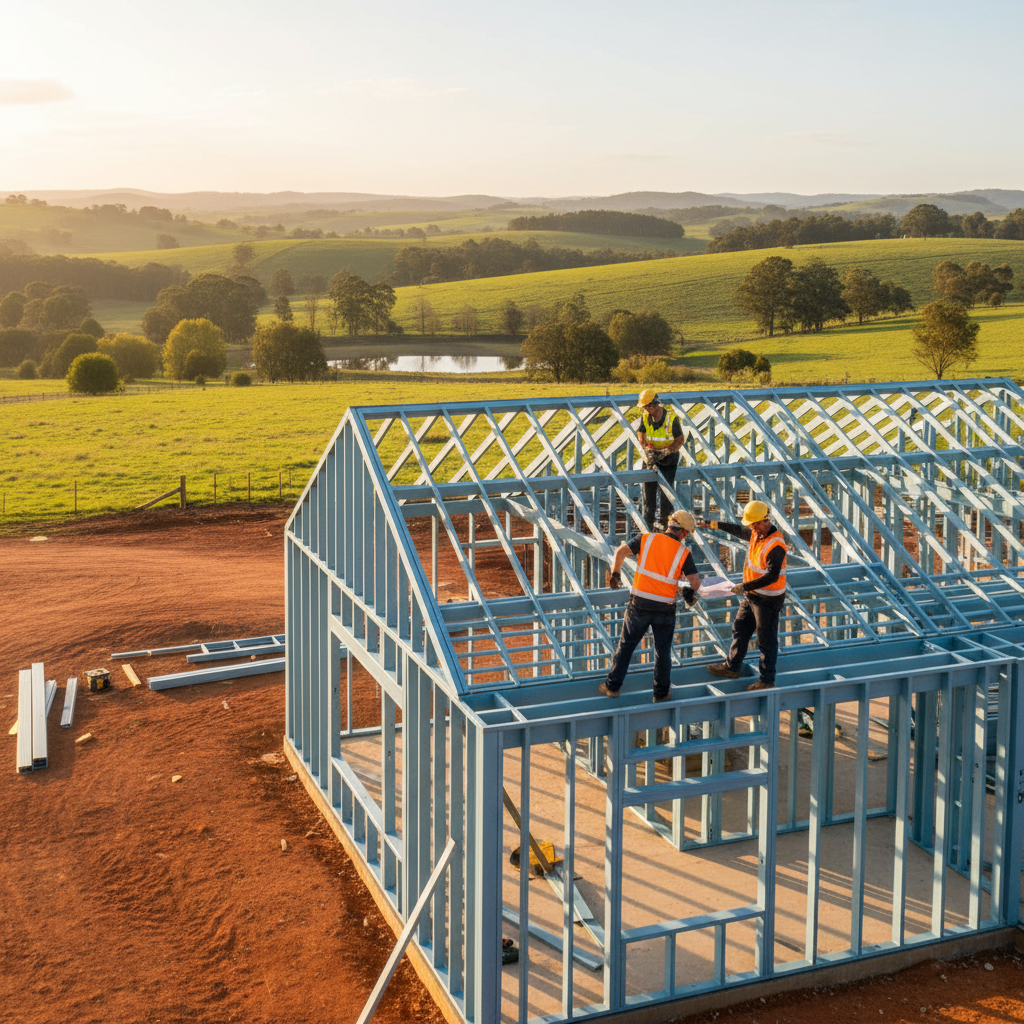
Standing the Frames
This is the best part. It’s's when it starts looking like a house. Because steel frames are light, you and a couple of mates can get the walls up remarkably fast. But don't get cocky. Use a spirit level on every single corner. If the bottom plates aren't straight, the roof won't fit. It's a simple equation.
One thing people forget is noggins. If you know you want a massive 75-inch TV on the wall in the lounge, put extra support in the frame now. Trying to find a stud behind plasterboard later is a pain, and even then, having that extra steel in there for the bracket to bite into makes a world of difference. Same goes for towel rails in the bathroom. Think ahead.
The Lock-up Phase
Lock-up is when the windows are in and the doors are hung. It’s a massive psychological win. You're out of the weather. But this is also when the 'invisible' work happens. The electrical cables get pulled through the pre-punched holes in the steel studs. The plumbing lines get run. Do not let your sparky or plumber just hack into the steel. They should be using plastic grommets to protect the cables from the edges of the steel. It's in the NCC Volume 2 for a reason. Protection against vibration and chafing is no joke when it comes to electricity.
Managing the Fit-out
Now you're playing project manager. You've got the plasterers coming in, then the tilers, then the kitchen mob. My advice? Don't overlap them too much. If the tiler is trying to lay floors while the painter is slogging away on the ceilings, they’ll be at each other's throats. Give them space. And keep the site clean. A messy site leads to mistakes. If there’s sawdust and offcuts everywhere, things get covered up that shouldn't be.
The Final Sign-off
You’re at the finish line, but you can't move in yet. You need your Occupation Certificate. The inspector will come back and check everything from your smoke alarms to your balustrade heights. They'll want to see your certificates for the glazing, the waterproofing in the wet areas, and the electrical safety cert. Keep a folder. Every receipt, every certificate, every piece of paper. If the inspector asks a question and you can pull the answer out of a tidy folder, you’ll breeze through. If you're digging through the glovebox of your ute looking for a crumpled invoice, he’s going to start looking closer at your work.
Building your own place isn't about saving a buck, though that's a nice side effect. It’s about knowing every screw and every stud in those walls. It’s about standing on your deck at sunset, looking at a roof you helped put up, and knowing it's not going anywhere. It’s hard work, it’s stressful, and you’ll probably want to quit at least twice. But once you’ve got those keys, and the council is off your back, it’s the best feeling in the world.


